“JeJeJe” – One Very Impressive Olive & Two Others that Can Use Some Reviewing & Retouching
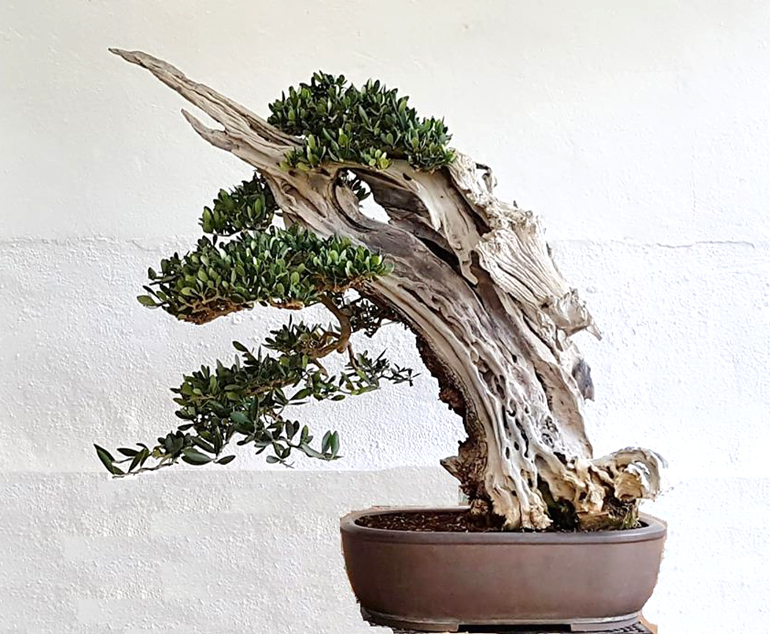
This impressive old Olive must have taken a long time to carve. Assuming that most of the deadwood was carved by human hands (with some power tools' help of course). Either way, it's masterpiece (though there's still the sacrifice shoots on the lowest branch, which will look a lot better when their work is done and they are removed). Speaking of the lowest branch, here's Salvador De Los Reyes' caption with this tree... "Vamos a dar mas fuerza a esa rama de abajo," and here's my translation... "We are going to strengthen the lower branch."
The photos of the three Olives and the Spanish text in this post are borrowed from Salvador De Los Reyes. Here’s his introduction to these trees… “Esta mañana he estado revisando y retocando algunos de los acebuches de la colección de Manolo Vargas.” And here’s the translation (mostly machine this time)… “This morning I have been reviewing and retouching some of the olive trees in the Manolo Vargas collection.”
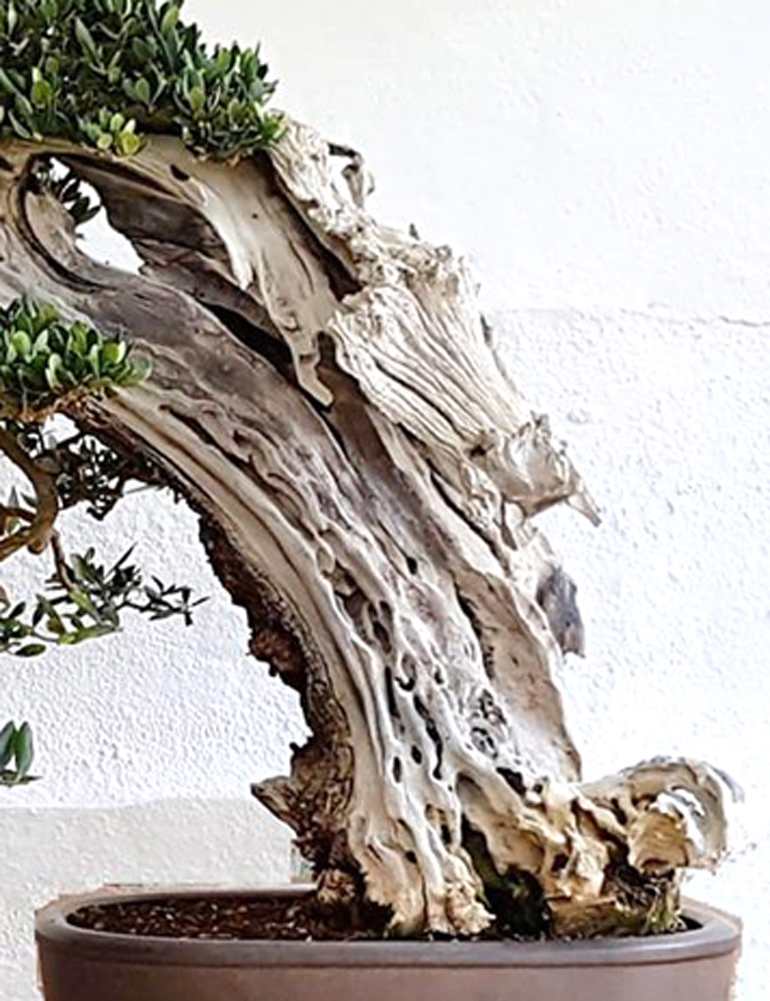
I cropped the photo above for a closer look at the trunk
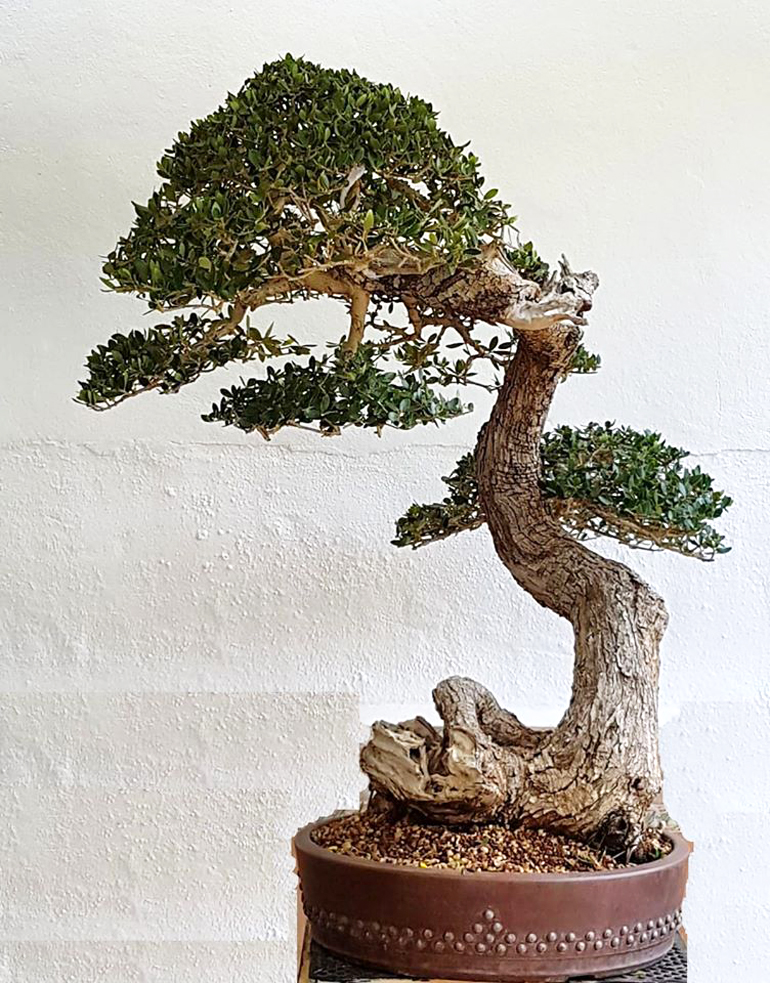
No caption with this, so we don't know what Salvador has in mind. Though you might think that some more carving could work. Perhaps on the pile of roots and lower trunk?
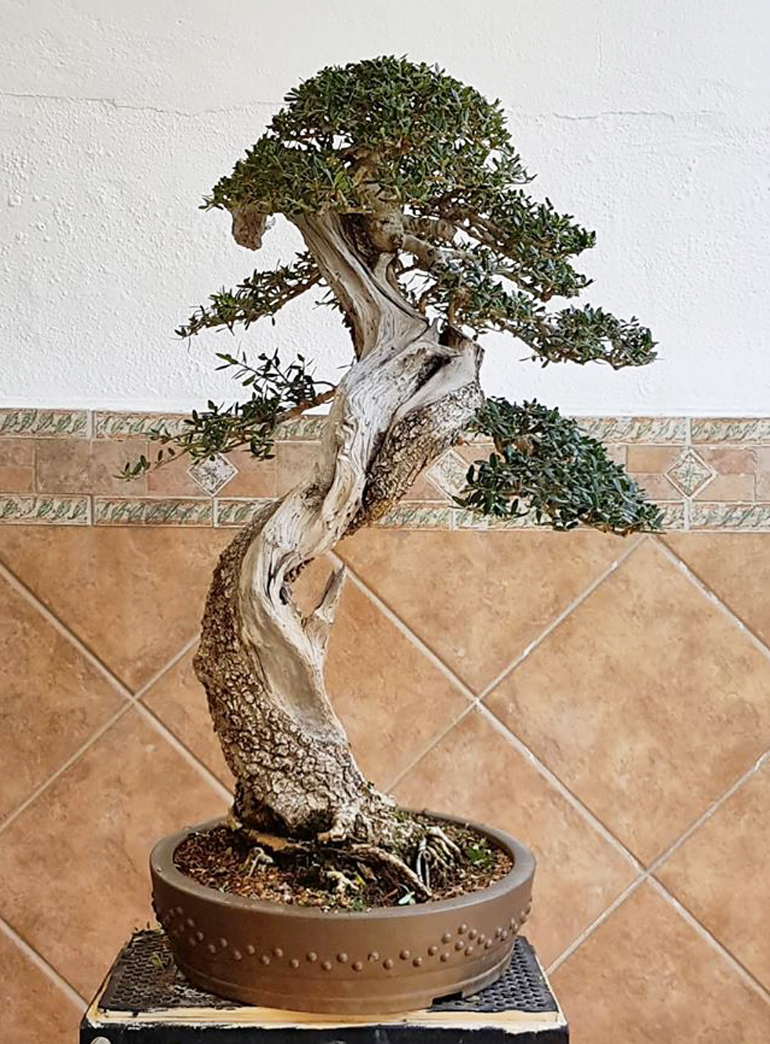
"Nos queda rehacer la mitad del árbol... jejeje literalmente." Here's the machine and me working together... "We have to redo half the tree... hehehe literally." I'm not sure I get the joke, except maybe mitad is a play on words. Perhaps referring to the middle as well as half?
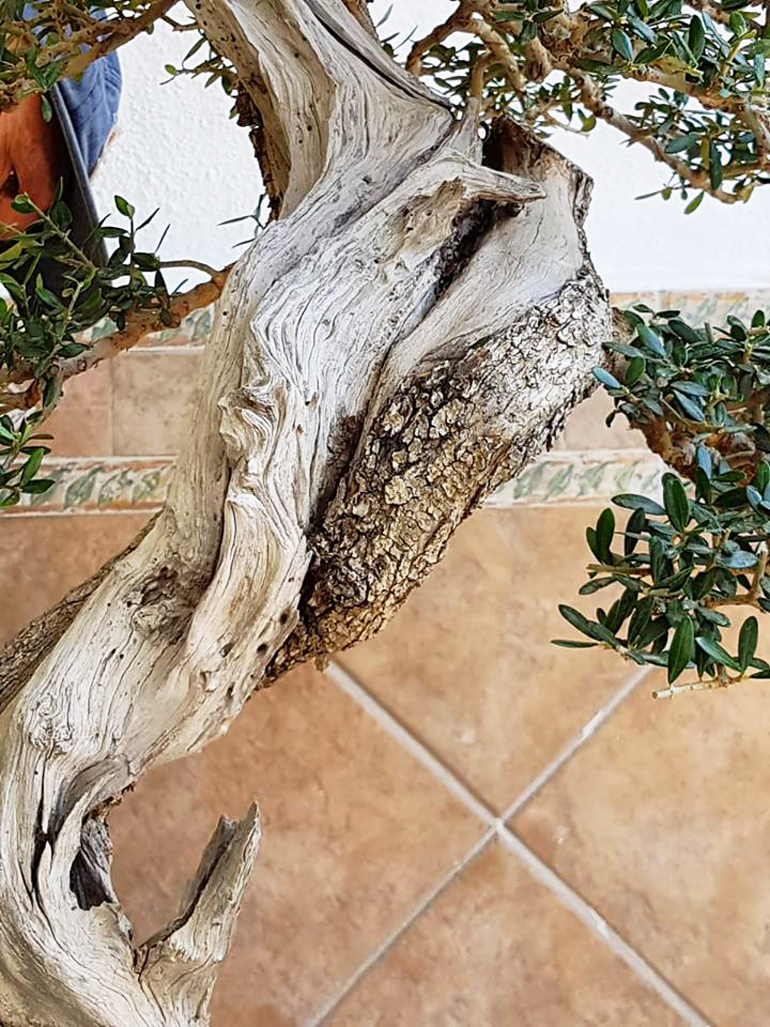
Here's that middle section that needs some work
Trident Maple Bonsai in a Well Chosen Pot
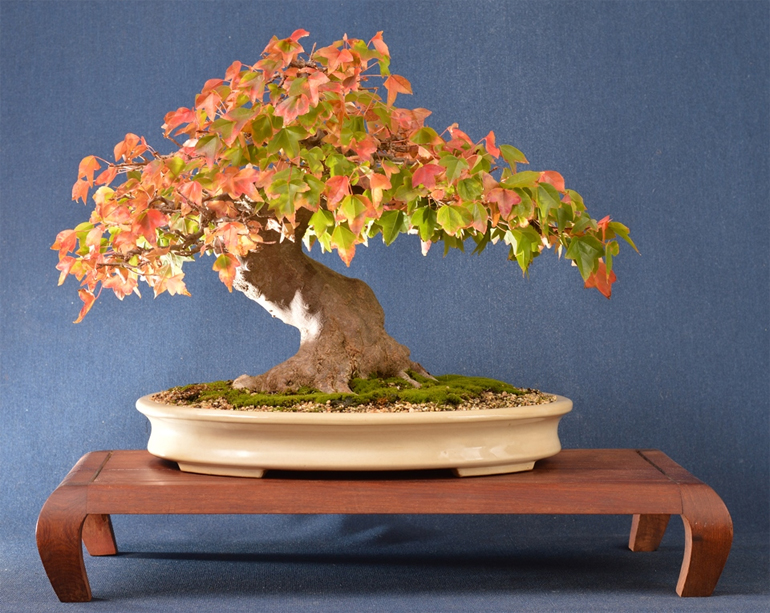
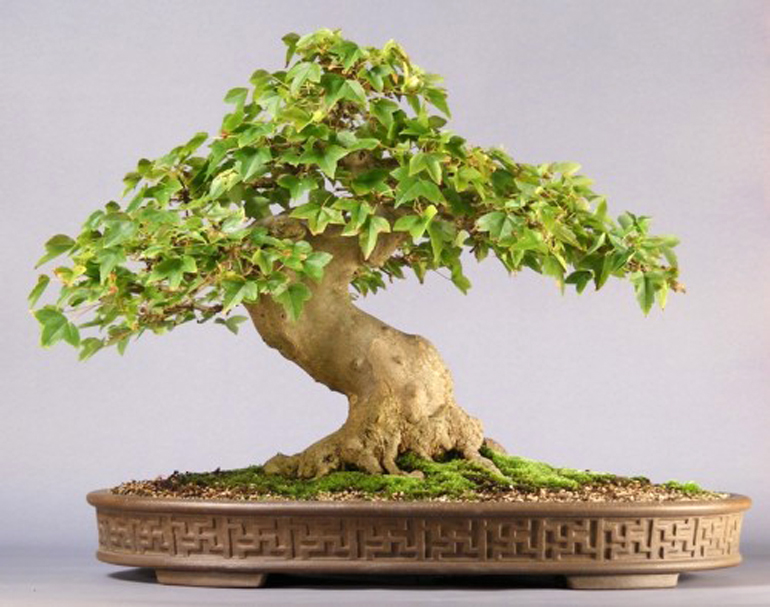
Sweet! I thought you might like to see this. It's Carl Morrow's Trident maple in a very well chosen and appropriately sized pot (Carl sent photos in an email, so no links)
Last week we featured a Robert Steven critique of a Trident maple that belongs to Carl Morrow (Size Matters & Small Is Beautiful). It was a repost of a one we originally did in September, 2010. Carl took Robert’s advice and repotted the tree into a smaller pot, though not the same pot Robert used in his simulation (it’s hard to find simulated pots!). As it turns out, I think this one is a better choice. BTW, Robert did make other important suggestions that also influenced Carl’s treatment of the tree
–
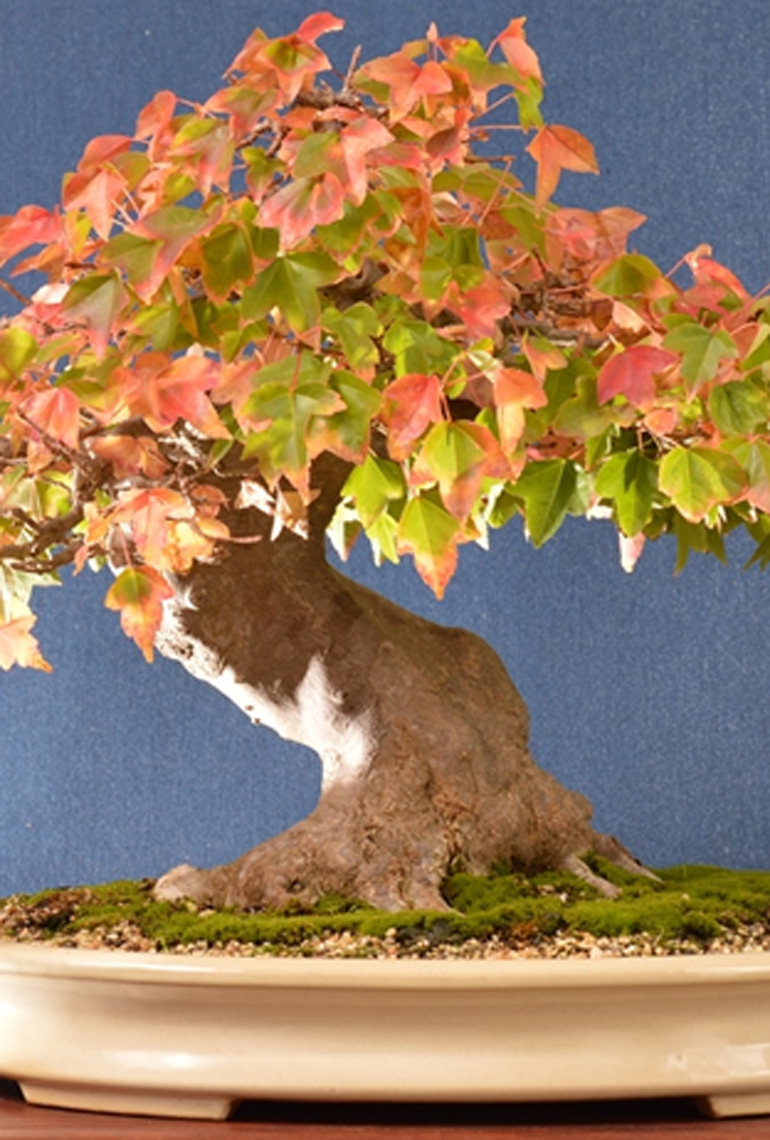
Closeup of the trunk and nebari
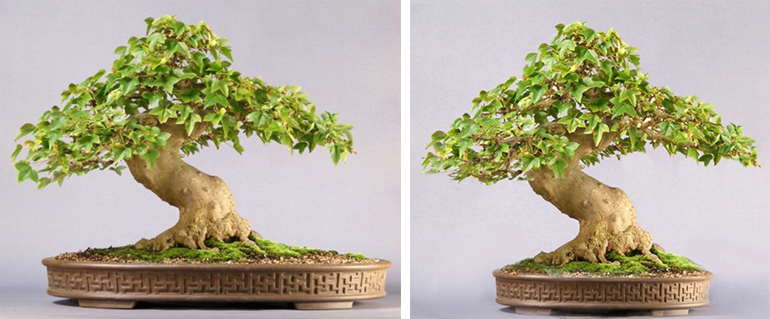
Carl's before shot and Robert's simulation (from 2010 and reposted last week). It makes sense that Robert would create a smaller version of the same pot. The important point is choosing a pot that emphasizes the tree rather than distracting from it, and size is one of the keys
Bjorn’s Bonsai for the Memory Bank
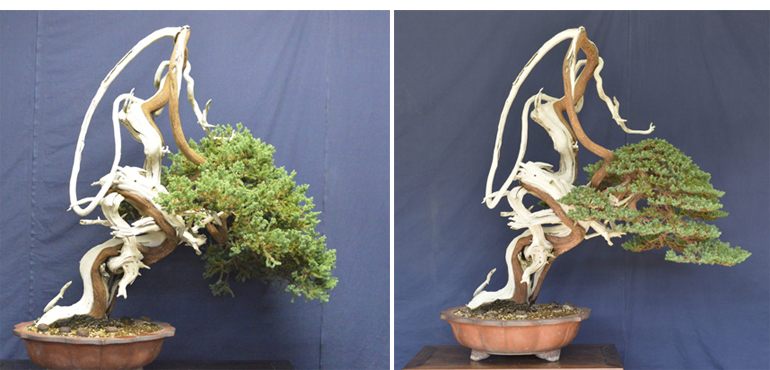
Before and after Juniper procumbens by Bjorn Bjorholm. The most obvious improvement is the foliage mass, but if you take a close look you see can many more changes, particularly the highlighting of the live vein (especially at the top of tree)
It’s time to revisit Bjorn Bjorholm one of our most talented young bonsai artists – many of whom, including Bjorn, apprenticed in Japan. The photos and quoted text in this post are from Bjorn’s blog
Before we go any further, do yourself a favor and take a look at Bjorn’s Advanced Bonsai Course. The price is right and if you take it, you and your bonsai will be happy you did
In Bjorn’s own words… “I’m often asked “How many trees do you think you’ve worked on over the years?” to which the only appropriate response is “I’ve lost count.” There are a few trees, though, that I’ve had the privilege of designing that have stuck in my mind as stand-out examples – perhaps none more than the Juniper featured in this post.”
Continued below…
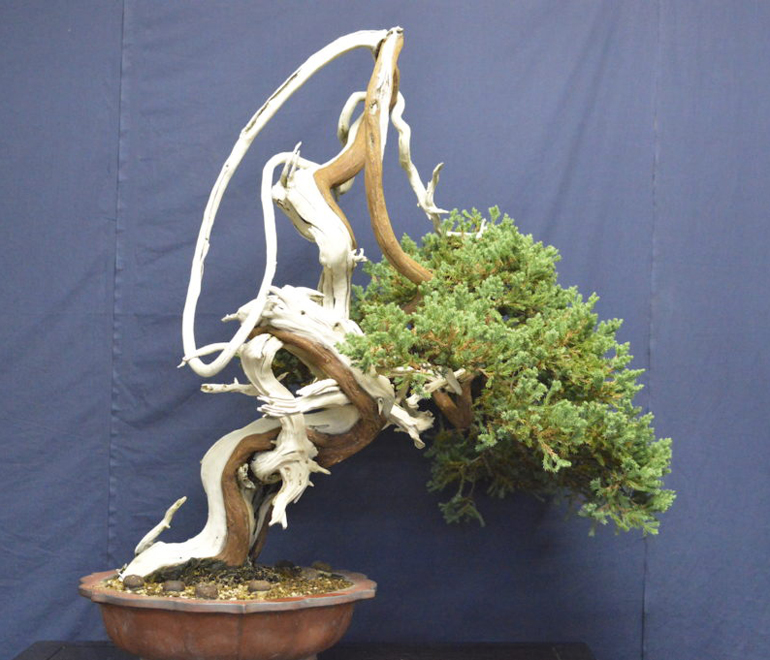
Before, a closer look
Bjorn, continued from above…
“Aside from the whimsical appearance of the trunkline, what is perhaps most interesting about this tree is that the foliage mass is fed entirely by the single, thin live vein that stretches upward to the highest point and abruptly cascades back down on itself. In other words, the foliage mass is simply dangling at the bottom of that long, skinny branch.”
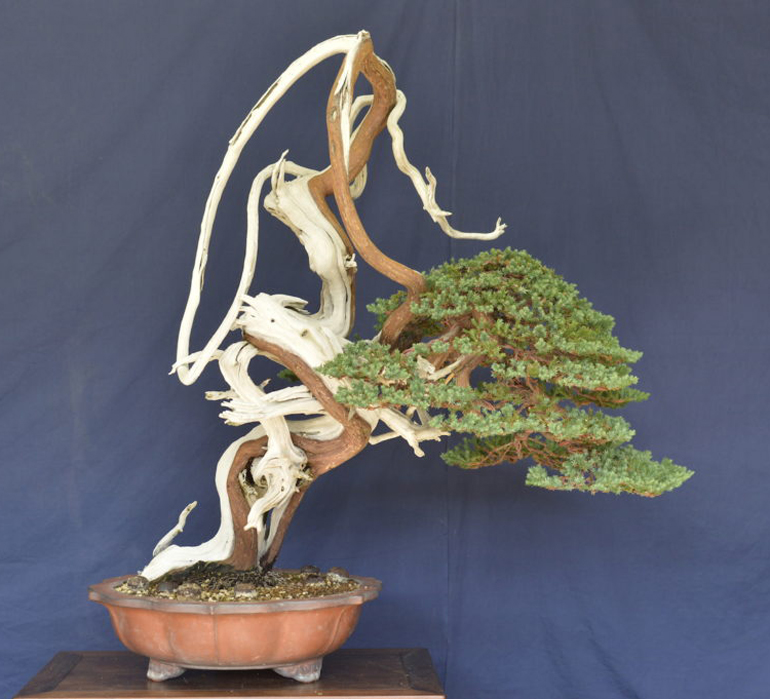
After. This one started as an amazing tree and now it's a highly refined amazing tree
Bjorn continued…
“After this particular styling, the tree was quickly purchased by one of our regular Kouka-en clients, who then maintained it for a couple of years at his garden before deciding that the foliage should be changed to Itoigawa Shimpaku via grafting – the process of which is currently underway.”
“Undoubtedly, this bonsai will be beautiful regardless of the foliage type, but I do have to say, I wish that the new owner had opted to keep the original procumbens foliage, as it adds a bit of uniqueness and character to the plant. In any case, I think it’s quite obvious why this tree has remained in the back of my mind after so many years, and I look forward to seeing it again soon.”
Bonsai, Before & After – Evolution & Elevation of a Native Scots Pine
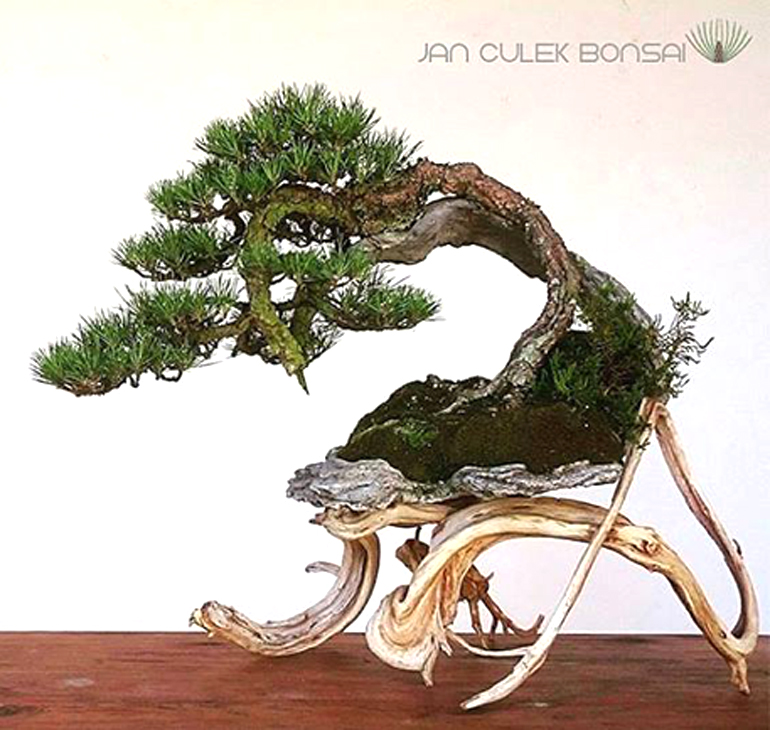
Jan Culek's caption for this yamadori pine reads... "Evolution of native Czech Sylvestris pine between the years 2013-2017." In English Pinus sylvertris is commonly called Scots pine. Jan makes no mention of the slab pot or the deadwood stand that supports it
Here’s one more post featuring the bonsai of Jan Culek. It’s an unusual before and after of a yamadori Scots pine. The tree itself is distinctive enough and shows off Jan’s skills, but I think it’s the deadwood underneath the tree that that elevates the bonsai and causes the whole presentation to stand out (if you suffer from fear of puns, please accept my apologies – twice!)
–
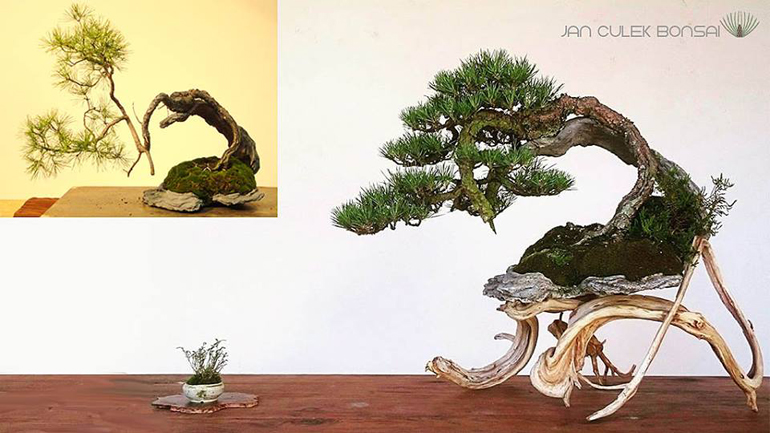
Before and after, with tiny companion
Before, closeup. The pot is similar to the one in the after shot. Perhaps they were both made by Erik Križovenský (the same Erik Križovenský that made the rocks in our first Jan Culek post) but that's just a guess
Before and After on a Well Established Bonsai
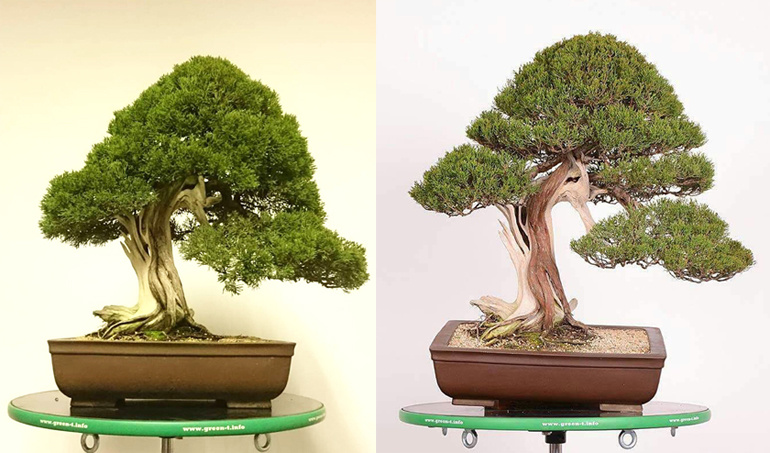
A maintenance before and after. No variety is listed, but it looks like it might be a Shimpaku juniper. The artist is Jan Culek.
Sticking with Jan Culek, our newfound bonsai artist (see yesterday). This one is a fairly simple maintenance before and after. The shape and other main features have already been established, so it’s time to bring it back to its previous beauty (and beyond). Mostly it’s a matter of thinning the overgrown foliage, cleaning the deadwood and applying lime sulfur, and also cleaning and brushing the the live veins to bring out their natural beauty. I don’t see any wire, so it looks like he’ll save rewiring for another time. The same goes for repotting. The photos are from Jan’s fb timeline
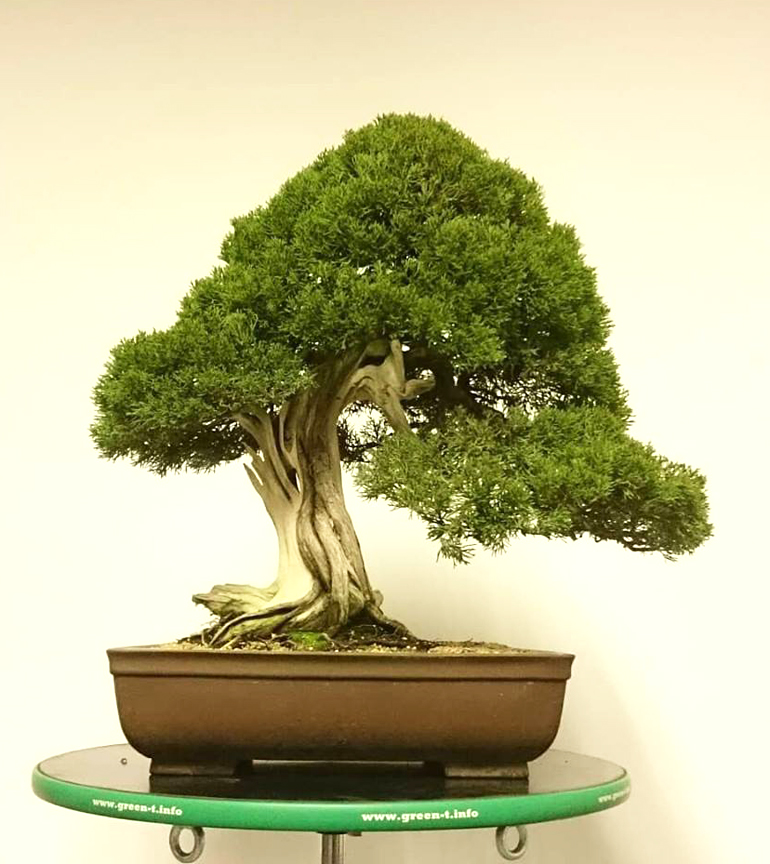
Before
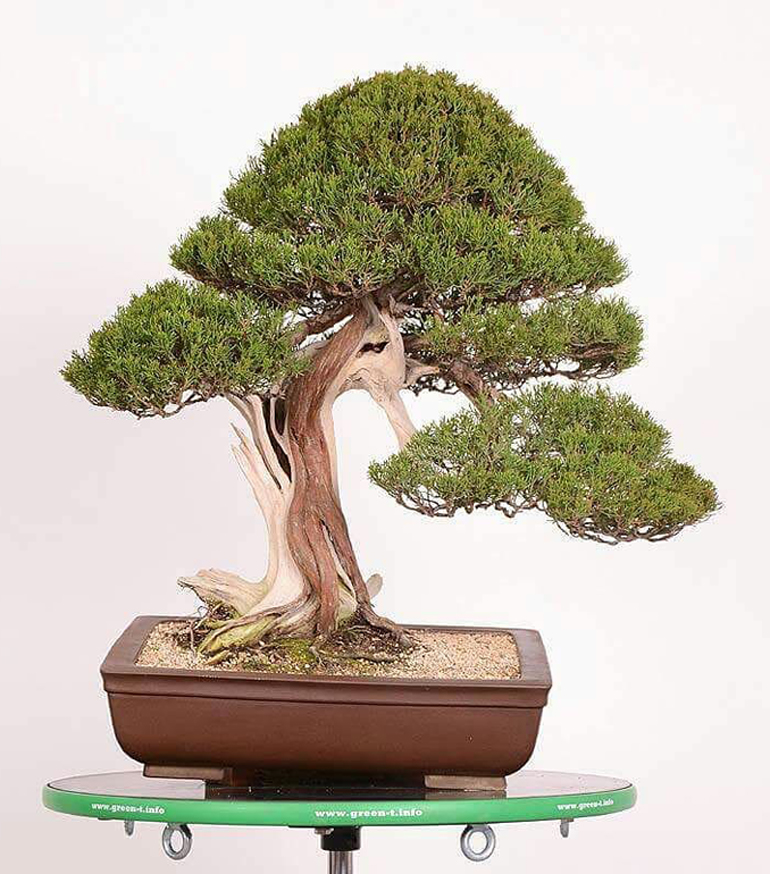
After
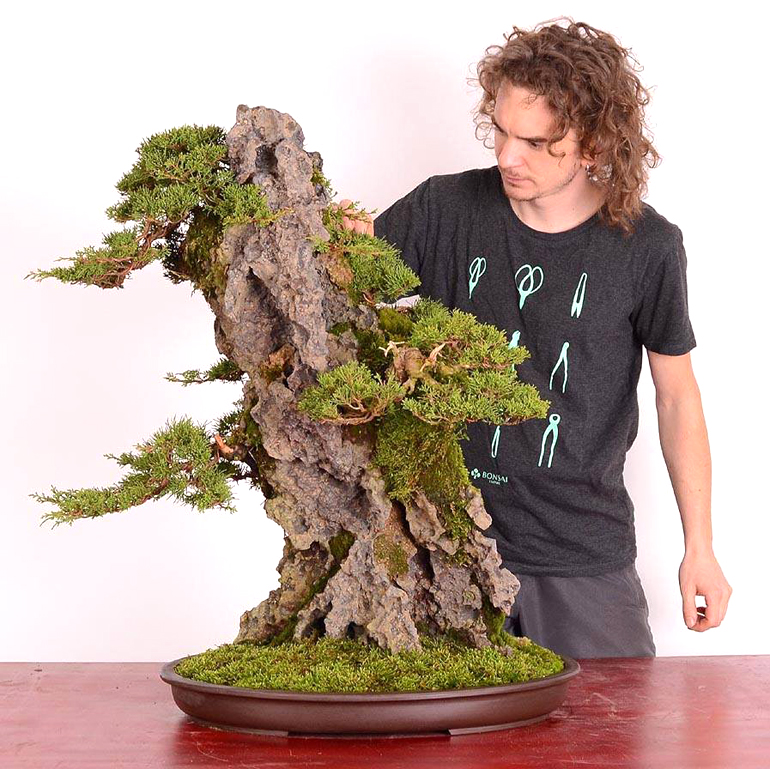
Jan Culek - Czech Republic. This photo of Jan is from the National Bonsai & Penjing Collection of Australia
If You Only Visit One Bonsai Event This Year…
THE ONE BONSAI SHOW NOT TO MISS!
Time to register and make your plans for accommodations etc. Bill Valavanis has all the information you need right here
Come visit us and our field grown Larches in the Vendors Section. We look forward to seeing you there!
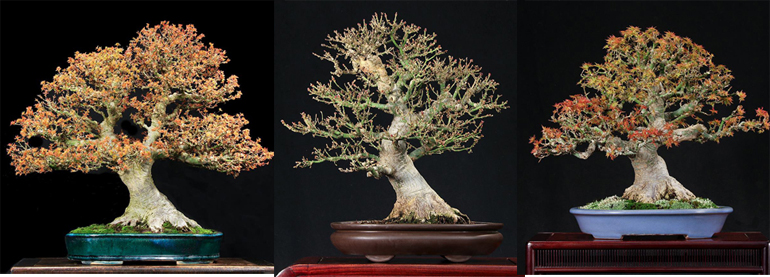
Bill Valavanis air layered these three Koto Hima Japanese maples from the same tree back in 1986
Something for Bonsai Rock Planting Lovers & Fans
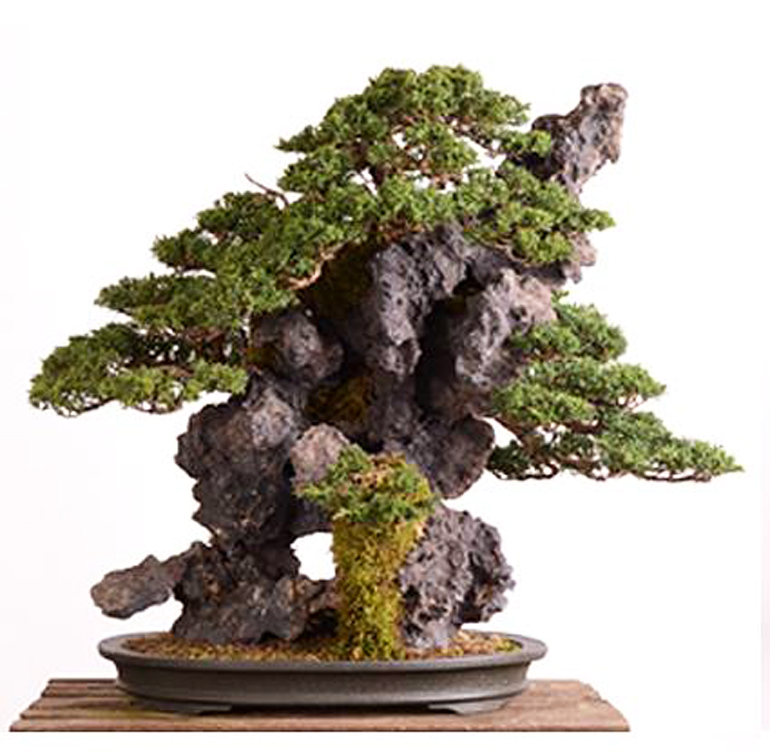
Great stone. Great planting. All but the lowest juniper appear to be growing in pockets of soil in the stone. This is referred to as a root-on-rock bonsai. It looks like the lowest one has its roots growing down into the pot (protected for now by moss). This would be root-over-rock style. The artist is Jan Culek
Continuing our rock planting theme from yesterday… Most large complex stones for bonsai plantings are made by human hands, and the ones shown here are no exception. They’ll all by Jan Culek
–
Freshly planted stone on a GREEN T TURNTABLE. Here's Jan's caption... "Today´s work with a freshly created rock planting. I enjoy to explore the potential of our stones and to play with ideas and shapes"
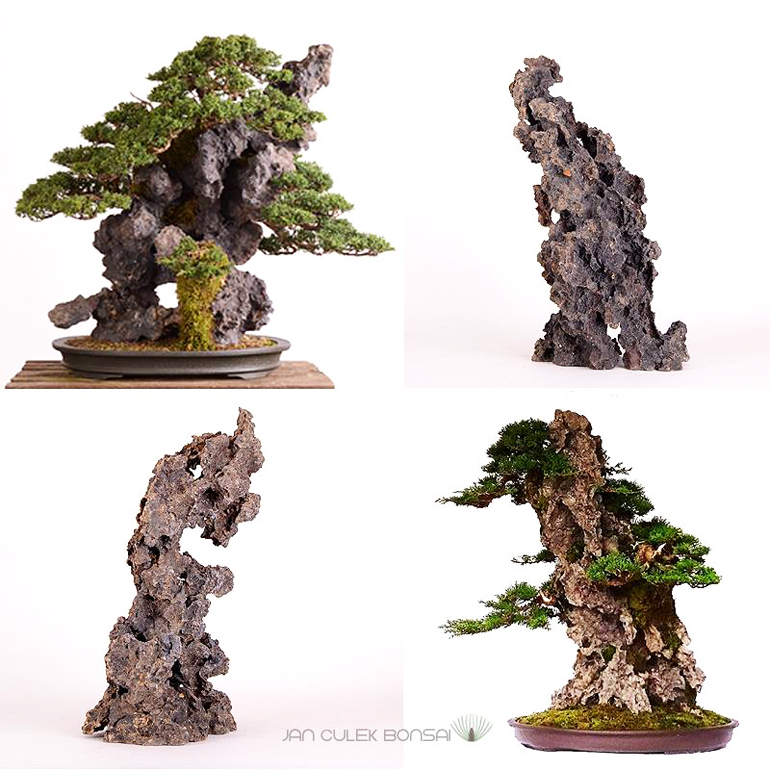
Two before and after stone plantings... Here's what the artist, Jan Culek wrote about his stones...
 "Something for all the rockplanting lovers and fans - the commission orders starts right now! If you like to order some special rock tower or stone from our production, don't hesitate and contact us at  info@janculekbonsai.com"
The artist at work using his GREEN T TURNTABLE. Here's his caption... "The highest piece from the collection, it is important to push the limits up..."
Hanging off a Cliff Somewhere in the Alps

This very distinctive bonsai belongs to Mauro Stemberger. The rock was made by Erik Križovenský, a master of unique pots and other creative vessels for planting bonsai. No mention is made of the type tree, but it looks like some type of Juniper. I cropped Mauro's original photo (below) to get a closer look and to eliminate some background noise
It’s past due time to revisit Mauro Stemberger, an old favorite here on Bark. If you’d like to see more of what Mauro is up to you can visit him on facebook and on his Italian Bonsai Dream website. You can also visit Erik Križovenský (the artist who made the rock), on his website and on facebook. –
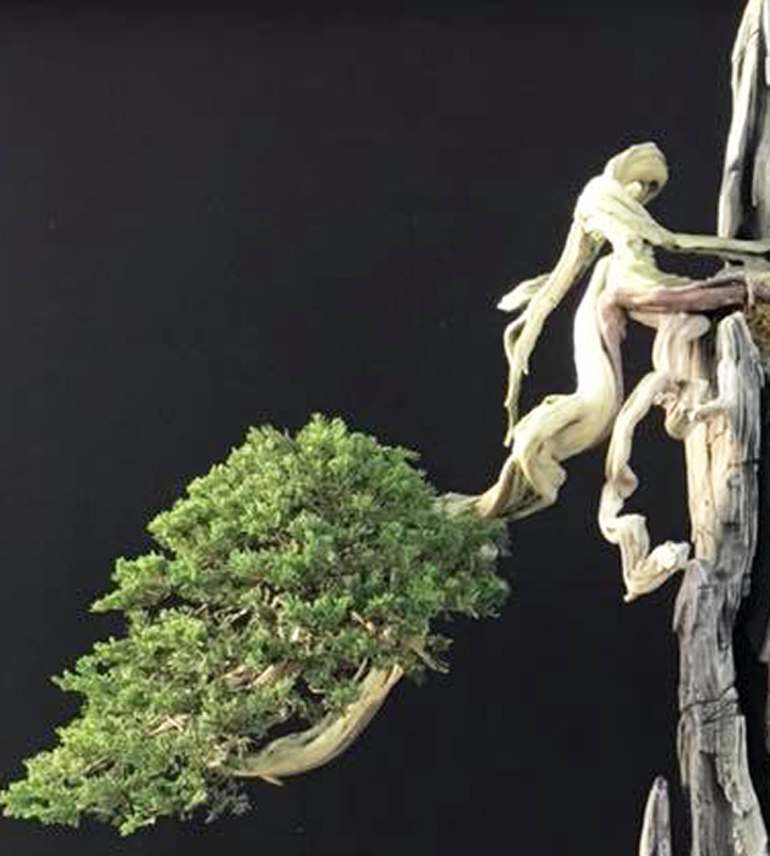
Hanging off a cliff somewhere in the Alps with its disappearing live vein and deadwood bones
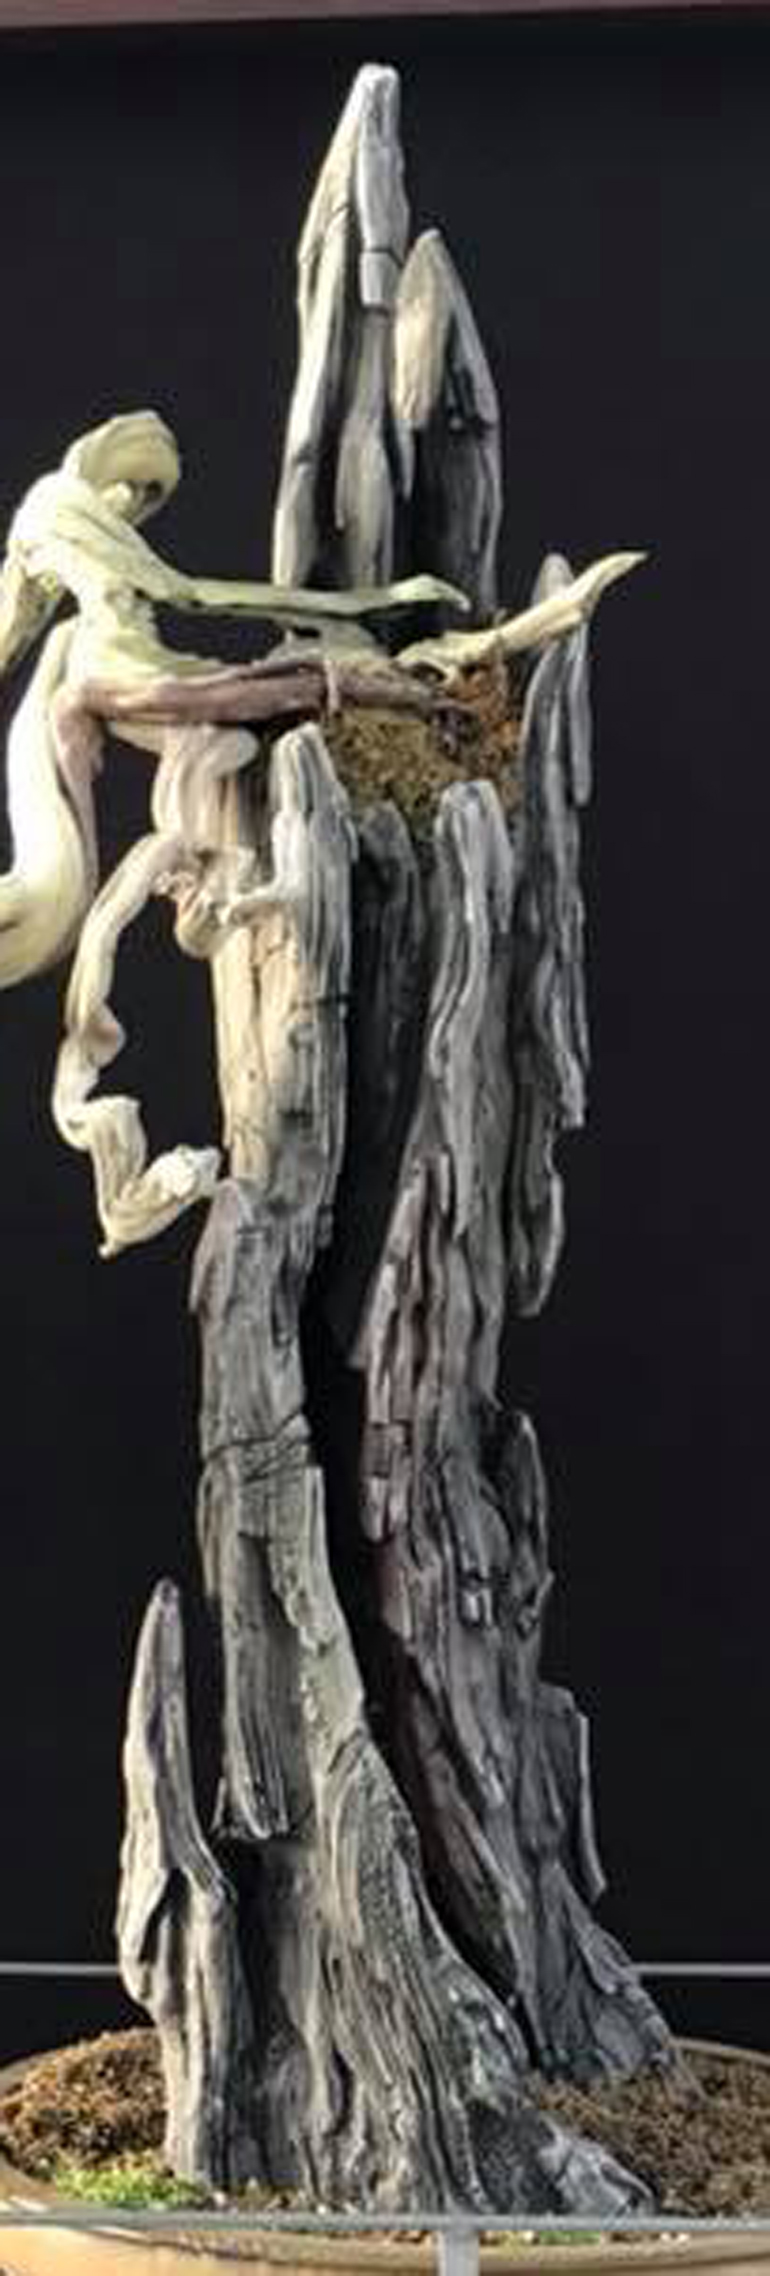
Erik Križovenský is a whiz when it come to unique pots and other vessels for planting bonsai
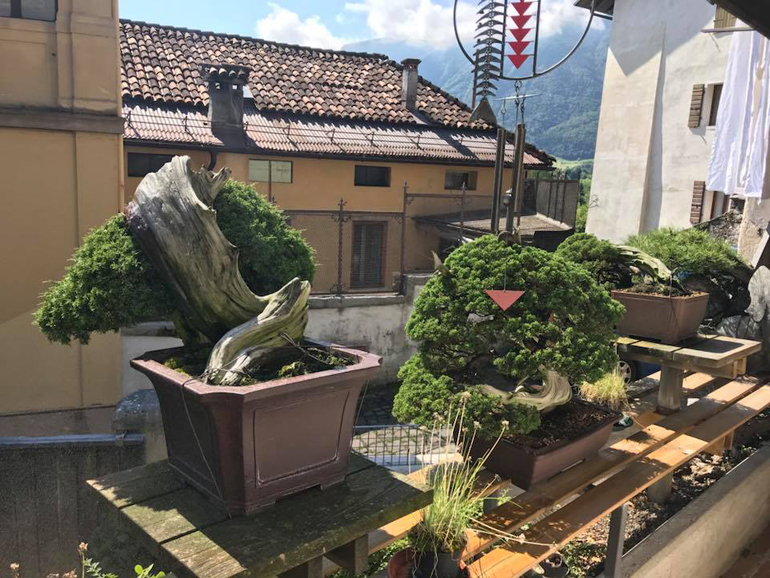
A piece of Mauro's balcony bonsai collection
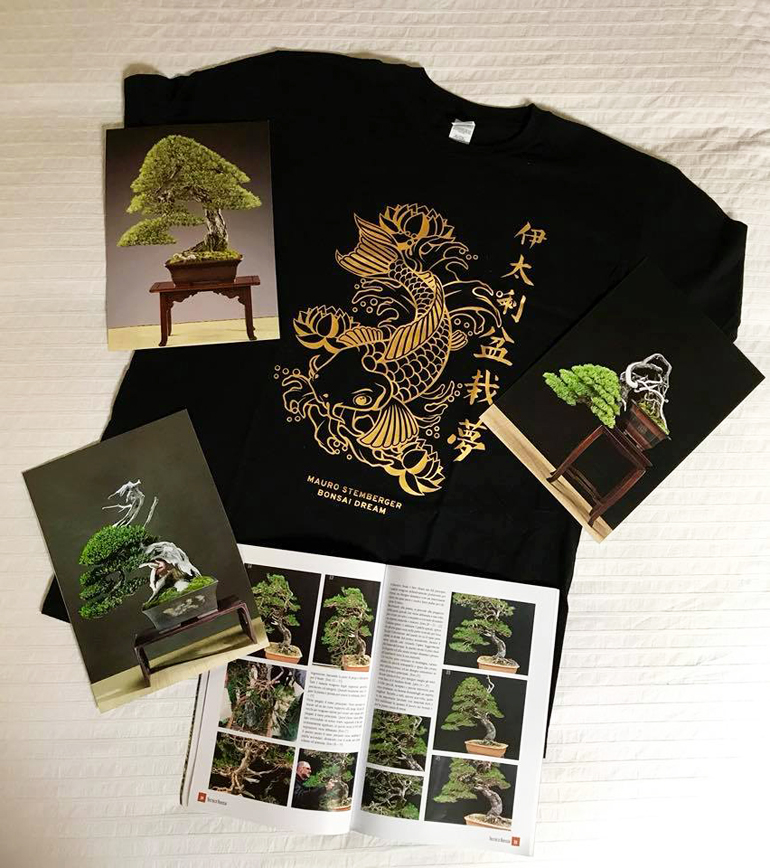
Maruo's T-shirt and bookThe original photo
Size Matters & Small Is Beautiful
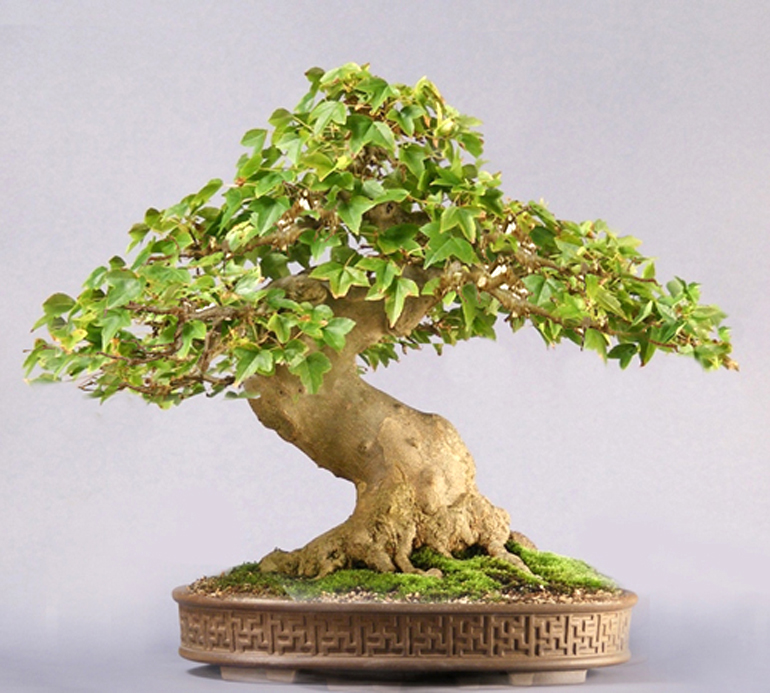
Robert Steven's digitally enhanced version of a Trident maple by Carl Morrow (the photo Carl submitted is below)
Continuing with the bonsai wisdom of Robert Steven, this was one of our earliest of his famous critiques (September, 2010). I’ve added the copy just below today, but Robert’s expert comments are exactly as wrote them eight years ago
The right pot can have a transformative effect on a bonsai. This includes the right size pot. A common mistake many of us make when we start, is over-potting trees. The mistaken view that trees need massive amounts of soil to thrive and grow is common and it can take a while to develop the confidence to move a tree into a suitably sized pot. Not so say it’s impossible to under-pot a bonsai, but that rarely happens (sometimes for show, trees are put into pots that may be a little small for long term health, but these trees are usually moved back a somewhat larger pot when the show is over).
There’s more we could say about optimal pot size (for example the negative effect of over potting trees for health and visual effect), but we’ll leave that for another time.
The original photo
Robert’s comments
“Despite the details, bonsai design is all about composition, and the pot is one of the most important composition elements. A well chosen pot can reflect and enhance the best features of a tree and effect the overall image, adding both nuance and balance.
“Our first impression is a sense of visual imbalance. This is due to pot size (which is too big) and improper potting position. Another disturbing thing is the foliage edge on the left side seems to be heavier than the right side. This creates and unbalanced effect, since the tree’s movement flows to the right.
“Solution :
- Reduce the foliage on the left to enhance the tree’s natural flow to the right.
- Prune some leaves to show some of the branches structure, this will give an older look to the tree.
- Use a smaller pot.
“There is more than one way to design any bonsai and my critiques and recommended solutions might not always fit your taste because of personal preferences. But I always try to give my opinion based on artistic and horticultural principles.”
You can visit Robert’s bonsai blog here: http://blogs.knowledgeofbonsai.org/robert_steven

